 |
| you are here > Class Notes - Chapter 2 - Lesson 2-1 | |||||||||||||||||||||||||||||||||||
|
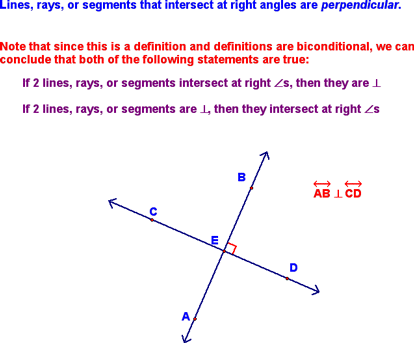
Perpendicularity - Lesson 2-1 Today, we started by defining what it meant for two lines to be perpendicular:
We then learned how to construct perpendiculars to a given line from a point not on the line. We started with a line and a point not on that line:
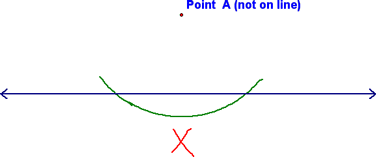
Next, we centered our compass at point A (the point not on the line), made our radius be bigger than the distance from that point to the given line, and constructed a "smiley face" arc:
We then created an "X marks the spot" by centering the compass at the points where the first arc intersected the given line and constructing arcs like the red ones below:
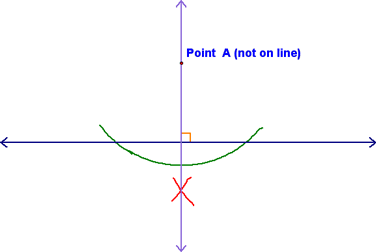
From here, we simply used the "X" and the given point to construct our perpendicular. Make sure to mark it correctly!
We then learned how to construct a perpendicular to a line from a point on that line. We started with a line and a point on it:
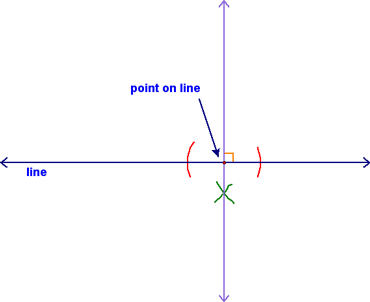
We then centered our compass at the point and constructed two arcs (with the same radius) that intersected the line on either side of the point:
At this point, the construction becomes similar to the previous one. You should be able to follow the two steps shown below! The first is to make the "X marks the spot":
And the second is to construct the perpendicular and mark it correctly!
So, at this point, you should know the following constructions:
You should also be able to combine these to construct angles of certain measure (e.g., 90°, 105°, 135°, 75°, etc). Remember that construction means using only a straight edge and a compass...no rulers or protractors!! Practice these things until you have them down pat!! |
|
||||||||||||||||||||||||||||||||||


